


Safety 1st thermometers are designed for quick, reliable body temperature readings, offering peace of mind for families; These devices, detailed in various manuals, prioritize ease of use and accuracy․
Digital medical thermometers, like the MT 1671, are suitable for oral, axillary, or rectal measurements, as described in provided documentation․
What is a Safety 1st Thermometer?
Safety 1st thermometers are medical devices specifically engineered for measuring human body temperature․ They come in diverse types, including digital models like the MT 1671, and ear thermometers, such as the Easy Read Ear Thermometer․
These thermometers are intended for home use, providing a convenient way to monitor health․ Manuals emphasize their role in quickly assessing a child’s or adult’s condition when illness is suspected, aiding in informed healthcare decisions․
Types of Safety 1st Thermometers Available
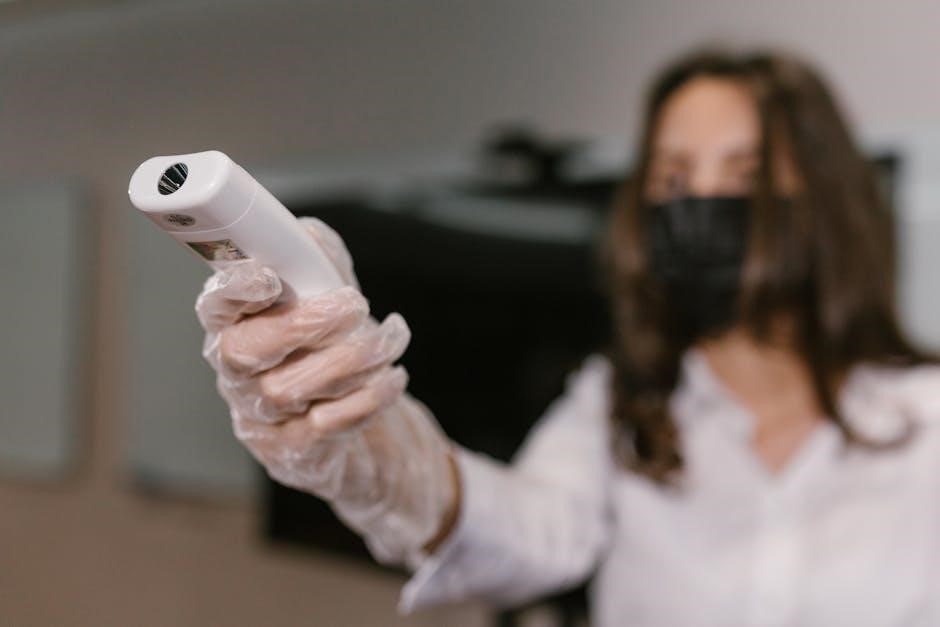
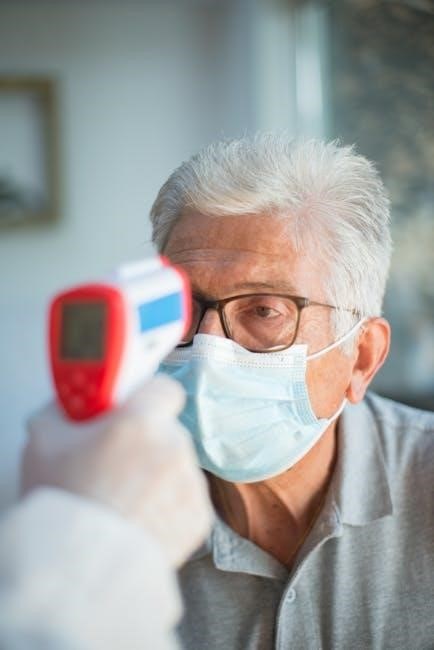
Safety 1st offers a range of thermometers to suit different needs․ Digital thermometers, like the MT 1671, are versatile for oral, axillary, and rectal use․ Infrared thermometers, such as the IR-T2, provide non-contact measurements․
The Easy Read Ear Thermometer offers a fast reading option․ Each type has specific instructions detailed in its manual, ensuring accurate temperature acquisition and appropriate usage for various age groups․

Important Safety Instructions
Carefully read the user manual before first use! These instructions detail crucial safety regulations and ensure proper operation of the Safety 1st thermometer․
General Safety Warnings
Always supervise children when they are using the thermometer, or when it is in use on a child․ This device is intended exclusively for body temperature measurement; do not use it for any other purpose․
Pay close attention to the safety regulations outlined in the manual․ Ensure the thermometer is kept clean and stored properly to maintain accuracy and prevent contamination․ Never modify the device․
Intended Use of the Thermometer (Body Temperature Only)
This Safety 1st thermometer is specifically designed and approved for measuring human body temperature via oral, rectal, or axillary routes․ It is not intended for any other medical purpose, nor should it be used on animals․
Using the thermometer for unintended applications may lead to inaccurate readings and potential harm․ Refer to the manual for detailed instructions on proper measurement techniques for each method․
Contraindications ⎼ When Not to Use
Do not use this Safety 1st thermometer if the device is damaged, or if you suspect any malfunction․ Avoid use immediately following contact with harsh chemicals or extreme temperatures․
The thermometer is unsuitable for individuals with severe circulatory issues or those who are unable to remain still during measurement․ Always consult a healthcare professional if you have concerns about using this device․

Understanding Thermometer Components
Safety 1st thermometers feature a power button, display screen, and a sensitive probe/sensor․ Manuals detail each component’s function for accurate temperature readings and proper operation․
Power Button and Functionality
The power button initiates and terminates thermometer operation․ Pressing and releasing the On/Memory button activates the device, displaying the last recorded temperature if available․
Manuals emphasize a gentle press to avoid unintended activation․ The button’s functionality extends to recalling stored readings from the thermometer’s memory, providing a history of temperature measurements․ Proper button use ensures accurate and efficient temperature monitoring for family health․
Display Screen and Indicators
The display screen clearly presents the measured temperature, often in Fahrenheit or Celsius․ Indicators signal device readiness, low battery levels, or error messages․ Upon activation, the screen typically displays the previously recorded temperature, offering immediate reference․
Manuals detail specific indicator meanings, ensuring users correctly interpret readings and device status․ A functional display is crucial for accurate temperature assessment and informed healthcare decisions․
Probe/Sensor Details
The thermometer’s probe, or sensor, is a critical component for accurate temperature detection․ Manuals emphasize gentle handling and proper cleaning of this sensitive part․ It’s designed for safe contact with the body during oral, rectal, or axillary measurements․
Ensure the probe is free from damage and debris before each use to maintain reliable readings․ Correct probe placement, as detailed in the instructions, is essential․
Operating Instructions ⸺ Oral Measurement
For oral use, gently fit the probe under the tongue, close the mouth, and breathe normally until a reading is obtained, as per the manual․
Preparing for Oral Temperature Taking
Before oral measurement, ensure the thermometer is clean and functioning correctly; The user should not have consumed hot or cold foods or drinks for at least fifteen minutes prior to taking a reading․
Avoid oral temperature taking immediately after eating, drinking, or smoking, as this can significantly affect accuracy․ Gently wash the thermometer probe with a mild soap and water solution, then dry it thoroughly before each use, following the manual’s guidance․
Proper Probe Placement
For oral use, gently place the thermometer probe under the tongue, towards the back of the mouth․ Ensure the user’s lips are closed around the probe to maintain contact and prevent inaccurate readings․
Instruct the individual to breathe through their nose during measurement․ Hold the thermometer firmly in place until a beep signals completion, as detailed in the product manual․ Avoid biting or clenching down on the device․
Reading and Interpreting Oral Temperature
Once the thermometer beeps, remove it from the mouth and carefully read the temperature displayed on the screen․ A normal oral temperature generally ranges between 97․6°F (36․4°C) and 99․6°F (37․6°C);
Slight variations can occur․ Consult a healthcare professional if readings are significantly higher or lower, or if you have concerns about a fever, as outlined in the user manual․

Operating Instructions ⸺ Rectal Measurement
Caution is required for rectal temperature taking․ Gently insert the lubricated probe no more than 1/2 inch into the rectum, as detailed in the manual․
Preparing for Rectal Temperature Taking
Before beginning, ensure the thermometer probe is clean and functioning correctly․ Gentle preparation is key for accurate readings and patient comfort․ Apply a water-soluble lubricant to the probe tip to facilitate easy and comfortable insertion․
Position the individual on their side with knees drawn up towards the chest, or lying face down․ This position aids in proper probe placement and minimizes discomfort during the measurement process, as outlined in the manual․
Proper Probe Placement (Caution Required)
Gently insert the lubricated probe no more than 1/2 to 1 inch (1․25 to 2․5 cm) into the rectum․ Never force the probe, as this could cause injury․ Hold the thermometer securely during the measurement process․
Constant, gentle support is crucial․ Monitor the individual for any signs of discomfort․ Rectal temperature taking requires extra care and attention to ensure safety and accuracy, as detailed in the product manual․
Reading and Interpreting Rectal Temperature
A rectal temperature is generally 0․5 to 1°F (0․3 to 0․6°C) higher than an oral temperature․ Normal rectal temperature ranges from 97․9°F to 100․4°F (36․6°C to 38°C)․
Consult a healthcare professional for guidance on interpreting readings, especially for infants and young children․ The thermometer displays the temperature; refer to the manual for specific indicator meanings and appropriate action based on the reading․
Operating Instructions ⎼ Axillary (Armpit) Measurement
Axillary temperature measurement involves placing the thermometer probe firmly in the armpit, ensuring skin contact․ Readings are typically lower than oral or rectal temperatures․
Preparing for Axillary Temperature Taking
Before taking an axillary temperature, ensure the armpit is dry․ Gently pat the area with a clean, dry towel to remove any moisture, as this can affect accuracy․
The patient should have their arm held snugly against their side․ This ensures good contact between the thermometer probe and the skin․
Avoid recent activity or bathing, as these can temporarily alter body temperature․ Allow time for stabilization before measurement․
For axillary measurement, gently place the thermometer probe high in the center of the armpit․ Ensure the probe is surrounded by skin and maintains firm contact․
Instruct the patient to keep their arm pressed firmly against their body throughout the measurement process;
Avoid pressing too hard, but ensure a secure fit for an accurate reading․ Hold still until the thermometer beeps, indicating completion․
Reading and Interpreting Axillary Temperature
Once the thermometer beeps, carefully remove it from the armpit․ Read the temperature displayed on the screen․ Axillary temperatures are generally about 0․5°F (0․3°C) lower than oral temperatures․
A normal axillary temperature is typically considered to be between 96․6°F and 98․6°F (35․9°C and 37°C)․
Consult a healthcare professional for guidance on interpreting temperature readings and determining appropriate action;
Memory Function and Usage
Safety 1st thermometers often store previous readings for tracking․ Pressing the “Memory” button recalls stored temperatures, aiding in monitoring health trends over time․
Storing Previous Readings
Many Safety 1st thermometers automatically retain the last temperature measurement taken, providing a convenient reference point․ This feature eliminates the need to immediately record the reading․ Some models may store multiple readings, creating a short-term history for comparison․
The device’s memory function is activated simply by taking a new temperature; the previous value is overwritten with the latest one․ This streamlined process ensures quick access to the most recent data․
Recalling Stored Temperatures
To access previously stored readings on a Safety 1st thermometer, typically you’ll need to press and release the “On/Memory” button․ This action will display the last recorded temperature on the screen․ Repeatedly pressing the button may cycle through a limited history of measurements, if the model supports it․
Refer to your specific thermometer’s manual for detailed instructions, as recall methods can vary between different models․
Battery Information
Safety 1st thermometers require specific battery types for optimal performance․ Always check your device’s manual for the correct type and proper installation guidelines․
Battery Type Required
Safety 1st thermometers generally utilize button cell batteries, often LR44 or similar alkaline types, to power their functionality․ Always consult the specific user manual accompanying your thermometer model to confirm the exact battery specification needed․ Using an incorrect battery type could damage the device or lead to inaccurate temperature readings․
Ensure the battery polarity (+ and -) is correctly aligned during installation, as indicated within the battery compartment․ Improper alignment will prevent the thermometer from operating correctly․
Battery Installation and Replacement
To install or replace the battery, locate the battery compartment, typically on the back or side of the Safety 1st thermometer․ Gently open the compartment using a small screwdriver if necessary․ Insert the correct battery type (refer to the ‘Battery Type Required’ section), ensuring proper polarity (+/-) alignment․
Close the compartment securely․ Always dispose of used batteries responsibly, following local environmental regulations․
Low Battery Indicator
The Safety 1st thermometer features a low battery indicator to alert you when the battery is nearing depletion․ A flashing symbol, often a battery icon, will appear on the display screen․ This indicates that the battery needs to be replaced to ensure accurate temperature readings․
Replace the battery promptly to avoid interruptions in use and maintain reliable performance․

Cleaning and Maintenance
Safety 1st thermometers require regular cleaning for hygiene and accuracy․ Use recommended cleaning solutions, and follow the proper cleaning procedure detailed in the manual․
Recommended Cleaning Solutions
Safety 1st recommends utilizing 70% isopropyl alcohol or a mild detergent solution for effective thermometer cleaning․ Avoid harsh chemicals, abrasive cleaners, or complete immersion in liquids, as these can damage the device․
Ensure the solution is applied to a soft cloth, gently wiping the probe and the thermometer’s body․ Thoroughly dry the thermometer after cleaning to prevent any potential damage or inaccurate readings․ Always consult the user manual for specific guidance․
Proper Cleaning Procedure
Safety 1st advises disconnecting the thermometer before cleaning․ Dampen a soft cloth with 70% isopropyl alcohol or a mild detergent solution․ Gently wipe the probe and the thermometer body, removing any residue․
Avoid getting moisture inside the device․ Rinse the cloth and wipe again with clean water, then thoroughly dry with a separate, clean cloth․ Regular cleaning ensures hygienic and accurate temperature measurements․
Storage Guidelines
Safety 1st recommends storing the thermometer in a cool, dry place, away from direct sunlight and extreme temperatures․ Keep it in its protective case when not in use to prevent damage to the sensitive probe․
Avoid storing near corrosive materials․ Ensure the battery compartment is closed securely․ Proper storage maintains the thermometer’s functionality and extends its lifespan for reliable temperature readings․

Troubleshooting Common Issues
Common issues include inaccurate readings or the thermometer failing to power on․ Check battery installation and replace if needed, consulting the manual for guidance․
Inaccurate Readings
If inaccurate readings occur, ensure proper probe placement, referencing the manual for oral, rectal, or axillary methods․ Confirm the thermometer isn’t exposed to extreme temperatures before use․
Verify correct battery installation, as low power can affect accuracy․ Repeat the measurement, ensuring the device remains stable during the process․ If issues persist, consult the user manual or contact support․
Thermometer Not Turning On
If the thermometer fails to power on, first check the battery compartment, ensuring correct battery type and polarity, as detailed in the manual․ Replace the battery with a new one, verifying proper installation․
Press and release the On/Memory button firmly․ If it still doesn’t activate, inspect the battery contacts for corrosion or damage․ Consult the manual’s troubleshooting section for further assistance․
Display Errors
If the display shows an error, consult the Safety 1st thermometer manual for specific code meanings․ Common issues might indicate low battery, probe malfunction, or internal errors․ Attempting a battery replacement is the first step․
If the error persists, avoid continued use and refer to the warranty information․ Do not attempt self-repair; contact customer support for guidance, as outlined in the product documentation․

Electrical Requirements
Safety 1st thermometers typically operate on small batteries; voltage specifications are detailed in the manual․ Always follow safety precautions regarding battery usage and replacement․
Voltage and Power Specifications
Safety 1st thermometers generally require low-voltage DC power, typically supplied by button-cell or AAA batteries․ Specific voltage requirements, such as 1․5V or 3V, are clearly indicated on the device itself and within the user manual․
These thermometers are designed for portability and do not require connection to mains electricity, eliminating associated electrical hazards; Always adhere to the specified battery type to ensure optimal performance and prevent potential damage to the thermometer’s internal circuitry․
Safety Precautions Regarding Electrical Use
Safety 1st thermometers are battery-operated and do not connect to mains electricity, minimizing electrical risks․ However, always handle batteries with care; avoid short-circuiting, disassembling, or ingesting them․
Ensure proper battery polarity during installation, as indicated in the manual․ Do not mix old and new batteries․ If the device will not be used for an extended period, remove the batteries to prevent leakage and potential corrosion․
Transportation and Storage
Safety 1st thermometers should be transported securely to prevent damage․ Store the device in a cool, dry place, away from direct sunlight and extreme temperatures․
Safe Transportation Methods
Transporting your Safety 1st thermometer requires careful consideration to avoid potential damage; Ensure the device is protected within its original packaging, or utilize a padded case during travel; Avoid subjecting the thermometer to extreme shocks, vibrations, or pressure․
When traveling, keep the thermometer within your carry-on luggage to maintain control and prevent loss․ Do not place it in checked baggage where it could be mishandled․ Gentle handling is key to preserving its accuracy․
Optimal Storage Conditions
To ensure longevity and accurate readings, store your Safety 1st thermometer in a cool, dry environment, away from direct sunlight and extreme temperatures․ Avoid storing it in humid locations like bathrooms, as moisture can damage the internal components․
Keep the device in its protective case when not in use․ Proper storage prevents dust accumulation and accidental impacts, maintaining its functionality for reliable temperature measurements․
Warranty Information
Safety 1st thermometers are backed by a warranty covering manufacturing defects․ Details regarding coverage length and claim procedures are typically found within the product’s documentation․
Warranty Coverage Details
Safety 1st thermometer warranties generally cover defects in materials and workmanship under normal household use․ This doesn’t include damage from misuse, accidents, or unauthorized modifications․
The warranty period varies by product, so referencing the specific manual is crucial․ Typically, it covers a limited time from the original purchase date․ Proof of purchase, like a receipt, is essential for any warranty claim․
Coverage may include repair or replacement of the defective unit, at the manufacturer’s discretion․
How to Claim Warranty
To initiate a warranty claim for your Safety 1st thermometer, retain your original proof of purchase․ Contact Safety 1st customer support, details found in the product manual, or on their official website․
Be prepared to provide the model number, date of purchase, and a detailed description of the defect․ You may need to return the product for inspection, following their provided instructions․
Shipping costs for warranty returns may be the responsibility of the consumer․

Disposal Information
Dispose of your Safety 1st thermometer responsibly, following local regulations for electronic waste․ Do not discard with general household trash; consider recycling options․
Proper Disposal Methods
Safety 1st thermometers, containing electronic components and potentially batteries, require careful disposal․ Do not simply throw the thermometer into household waste bins․ Instead, check with your local municipality for designated electronic waste (e-waste) collection programs or recycling centers․
These facilities ensure environmentally sound handling of the device’s materials․ Removing the battery before disposal is often recommended, and batteries should be recycled separately at designated battery recycling locations․
Environmental Considerations
Safety 1st acknowledges the importance of minimizing environmental impact․ Proper disposal of the thermometer, as detailed previously, prevents hazardous materials from entering landfills․ Recycling electronic components conserves resources and reduces pollution․
Choosing to recycle, rather than discard, demonstrates a commitment to sustainability․ Consider the lifecycle of the product and prioritize responsible e-waste management practices to protect the environment for future generations․