


Costco’s cauliflower pizza offers a delicious, health-conscious meal with a crispy crust and flavorful toppings, perfect for quick dinners or special dietary needs․
1․1 Overview of the Product
Costco’s cauliflower pizza is a frozen, pre-made dish featuring a cauliflower-based crust topped with tomato sauce, mozzarella cheese, and various seasonings․ Designed for health-conscious consumers, it offers a low-carb and gluten-free alternative to traditional pizza; The product is convenient, requiring minimal preparation, and caters to special dietary needs while maintaining flavorful appeal․ Its popularity stems from its balance of taste and nutritional benefits, making it a versatile option for quick meals or gatherings․
1․2 Popularity and Health Benefits
Costco’s cauliflower pizza has gained significant popularity due to its health-conscious appeal․ The low-carb, gluten-free crust makes it an excellent option for those with dietary restrictions․ With fewer calories and higher protein content compared to traditional pizza, it caters to health-focused consumers․ The product’s popularity also stems from its convenience and delicious taste, making it a favorite for quick, nutritious meals; Its balanced nutritional profile and versatility in customization further enhance its appeal among diverse audiences seeking healthier alternatives without compromising on flavor․

Cooking Instructions for Costco Cauliflower Pizza
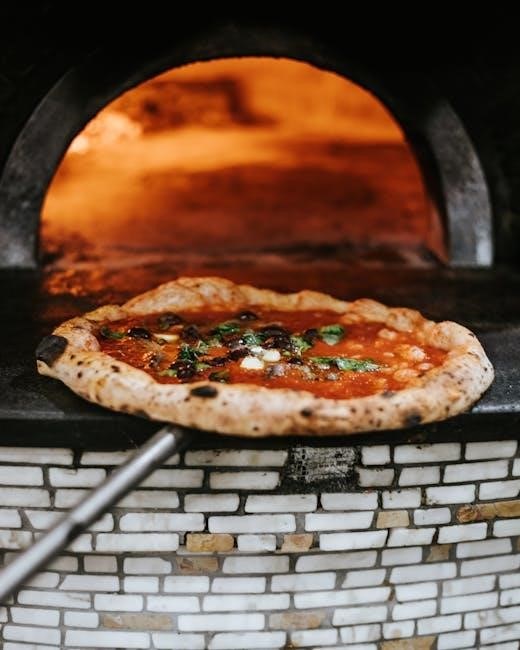
Preheat your oven to 425°F (220°C)․ Place the frozen pizza directly on the center rack without a baking sheet․ Bake for 12-15 minutes until the crust is golden and cheese is bubbly․ Allow it to cool for 2-3 minutes before slicing and serving․ For extra crispiness, broil for an additional 1-2 minutes, ensuring a perfectly cooked cauliflower pizza every time․
2․1 Preheating the Oven
Preheat your oven to 425°F (220°C)․ Allow it to preheat for 10-15 minutes to ensure even cooking․ A properly preheated oven is crucial for achieving a crispy crust and perfectly melted cheese․ This step ensures the cauliflower crust cooks evenly without sogginess․ Do not skip preheating, as it directly impacts the pizza’s texture and flavor․ Ensure your oven is at the correct temperature before placing the pizza inside for the best results․ Proper preheating helps in achieving a golden-brown crust and a deliciously cooked pizza․ For accuracy, use an oven thermometer to confirm the temperature․
2․2 Preparing the Crust
Start by removing the pizza from its packaging․ Gently take the cauliflower crust pizza out of the box and discard the wrapping․ For a crisper crust, place the pizza directly on the center oven rack without using a baking sheet or pizza stone․ Optionally, you can line the rack with parchment paper for easier cleanup․ Ensure the pizza is not thawed before cooking, as this can make the crust soggy․ Properly positioning the crust ensures even cooking and prevents it from bending or breaking․ Avoid overlapping or overcrowding the oven rack for optimal results․ Follow these steps to prepare the crust before adding toppings or baking․
2․3 Adding Sauce and Toppings
Spread the tomato sauce evenly over the cauliflower crust, leaving a small border around the edges․ Sprinkle shredded mozzarella cheese and your preferred toppings, such as pepperoni, vegetables, or herbs․ Avoid overloading the pizza to prevent sogginess․ For extra flavor, add a sprinkle of oregano or basil․ Ensure toppings are evenly distributed for balanced flavor and texture․ Keep it simple or customize to your taste, then proceed to bake for a delicious, personalized meal․
2․4 Baking the Pizza
Place the pizza directly on the middle oven rack at 425°F (220°C)․ Bake for 12-15 minutes, or until the crust is golden brown and the cheese is bubbly․ Avoid using a baking sheet or pizza stone for crispiness․ Do not open the oven during baking to ensure even cooking․ Once cooked, remove the pizza from the oven and let it cool for 2-3 minutes before slicing․ This step ensures the cheese sets and the crust retains its crispiness, resulting in a perfectly cooked cauliflower pizza․
2․5 Letting it Rest
After baking, remove the pizza from the oven and let it rest for 2-3 minutes․ This allows the cheese to set and prevents it from oozing excessively when sliced․ Avoid slicing immediately, as this can make the crust soggy․ Use this time to prepare any additional toppings or garnishes․ Letting the pizza rest ensures a cleaner cut and a crisper crust, enhancing the overall texture and flavor․ For extra crispiness, consider broiling for an additional 1-2 minutes before resting, but this step is optional․
2․6 Slicing and Serving
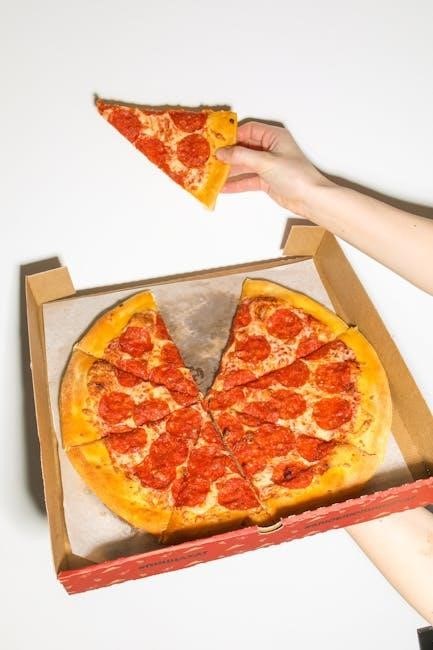
Once the pizza has rested, use a sharp knife or pizza cutter to slice it into even portions․ For clean cuts, slice gently but firmly, avoiding excessive pressure that could break the crust․ Serve immediately while the crust is crisp and the cheese is melted․ Pair with a side salad or garlic knots for a complete meal․ Optional dips like marinara or ranch can enhance the flavor․ Ensure plates are ready to maintain the pizza’s texture and warmth during serving․

Tips for the Perfect Cauliflower Crust
Preheat the oven thoroughly, avoid thawing, and use parchment paper for crispiness․ Bake directly on the rack for even cooking and a golden-brown finish․
3․1 Watching the Cooking Time
Monitoring the cooking time is crucial for achieving the perfect crust․ Bake the pizza between 12-15 minutes at 425°F․ Keep an eye on it during the last few minutes to prevent burning․ The crust should be golden brown, and the cheese should be bubbly but not overly browned․ Adjust the time slightly if needed, ensuring the crust doesn’t become too dark or the toppings don’t overcook․ Proper timing ensures a crispy, well-cooked pizza every time․
3․2 Optional Broiling for Crispiness
For an extra crispy crust, consider broiling the pizza for 1-2 minutes after baking․ Place the pizza under the broiler on high, watching closely to avoid burning․ This step enhances the crust’s golden brown color and adds crunch․ Ensure the oven rack is positioned to allow even browning․ Broiling is optional but recommended for those who prefer a crisper texture․ Keep an eye on the pizza at all times during this process, as it can quickly go from perfectly toasted to burnt․

Customizing Your Cauliflower Pizza
Personalize your Costco cauliflower pizza by adding fresh toppings like herbs, extra cheese, or protein․ Pair it with sides like salads or garlic bread for a complete meal․
4․1 Choosing Toppings
Enhance your Costco cauliflower pizza by selecting toppings that complement its unique flavor․ Popular choices include fresh vegetables like spinach, mushrooms, and bell peppers, as well as proteins such as chicken or pepperoni․ For a Mediterranean twist, add olives, artichokes, or feta cheese․ Keep it simple with extra cheese or go bold with unique combinations․ Ensure toppings are evenly distributed to avoid overwhelming the delicate crust․ Opt for gluten-free options if needed, and don’t forget a sprinkle of fresh herbs for added freshness․
- Fresh vegetables: spinach, mushrooms, bell peppers
- Proteins: chicken, pepperoni, or bacon
- Mediterranean accents: olives, artichokes, feta
- Herbs: basil, oregano, or parsley
Remember, balance is key to maintaining the pizza’s crispiness and flavor profile․
4․2 Suggested Side Dishes
Pair your Costco cauliflower pizza with sides that enhance its flavors without overpowering it․ A fresh green salad with light dressing adds a refreshing contrast․ Roasted vegetables like broccoli or asparagus provide a healthy, balanced option․ For a lighter choice, consider a simple pasta salad with gluten-free pasta․ Garlic bread (gluten-free if needed) complements the savory tones of the pizza․ These sides offer variety and texture, making the meal satisfying and well-rounded․
- Fresh green salad with light dressing
- Roasted vegetables (e․g․, broccoli, asparagus)
- Gluten-free pasta salad
- Garlic bread (gluten-free option)
These options balance the meal while maintaining its dietary benefits․
Nutritional Benefits and Considerations
Costco cauliflower pizza is low in carbs and gluten-free, offering a healthier alternative to traditional pizza․ It provides essential nutrients like fiber, vitamins, and antioxidants from cauliflower․
5․1 Low-Carb and Gluten-Free Options
The Costco cauliflower pizza is an excellent choice for those seeking low-carb and gluten-free options․ Made with a cauliflower-based crust, it offers a nutritious alternative to traditional pizza․ The crust is free from gluten, making it suitable for individuals with gluten intolerance or sensitivity․ Additionally, the low-carb content appeals to those following a ketogenic or low-carb diet․ With its rich flavor and wholesome ingredients, this pizza provides a guilt-free dining experience while catering to various dietary preferences and restrictions․ It’s a great way to enjoy pizza without compromising on taste or nutrition․
5․2 Protein Content and Dietary Advantages
The Costco cauliflower pizza is a nutrient-rich option, offering approximately 25 grams of protein per serving, making it a great choice for fitness enthusiasts or those seeking a protein-packed meal․ With only 10 total carbs per crust, it aligns perfectly with low-carb and ketogenic diets․ The cauliflower crust is also gluten-free, catering to individuals with gluten intolerance․ This pizza provides a balanced mix of protein, healthy fats, and minimal carbohydrates, making it an excellent dietary choice for those aiming to manage blood sugar levels or maintain a nutritious lifestyle․
Troubleshooting Common Issues
Soggy crust? Ensure even cooking by placing pizza directly on the oven rack without a baking sheet․ Avoid thawing before baking to maintain crispiness and texture․
6․1 Avoiding a Soggy Crust
To prevent a soggy crust, ensure the pizza is placed directly on the oven rack without a baking sheet, allowing direct heat to crisp the crust evenly․ Avoid thawing the pizza beforehand, as this can release excess moisture․ Parchment paper can be used if preferred, but it’s not necessary for crispiness․ Optional broiling for 1-2 minutes after baking can enhance crunchiness․ Proper airflow and even cooking are key to achieving a perfectly crispy crust every time․
6․2 Ensuring Even Cooking
For even cooking, preheat your oven thoroughly and place the pizza directly on the center rack to ensure consistent heat distribution․ Rotate the pizza halfway through baking to prevent hot spots․ Avoid overcrowding the oven, as this can disrupt airflow․ Monitor the pizza closely during the final minutes, as cooking times may vary․ Using a metal tray or rack can also promote even cooking․ Proper placement and attention during baking ensure a uniformly cooked and delicious result every time․